FREE BEADING TUTORIAL: Good Fortune Earrings
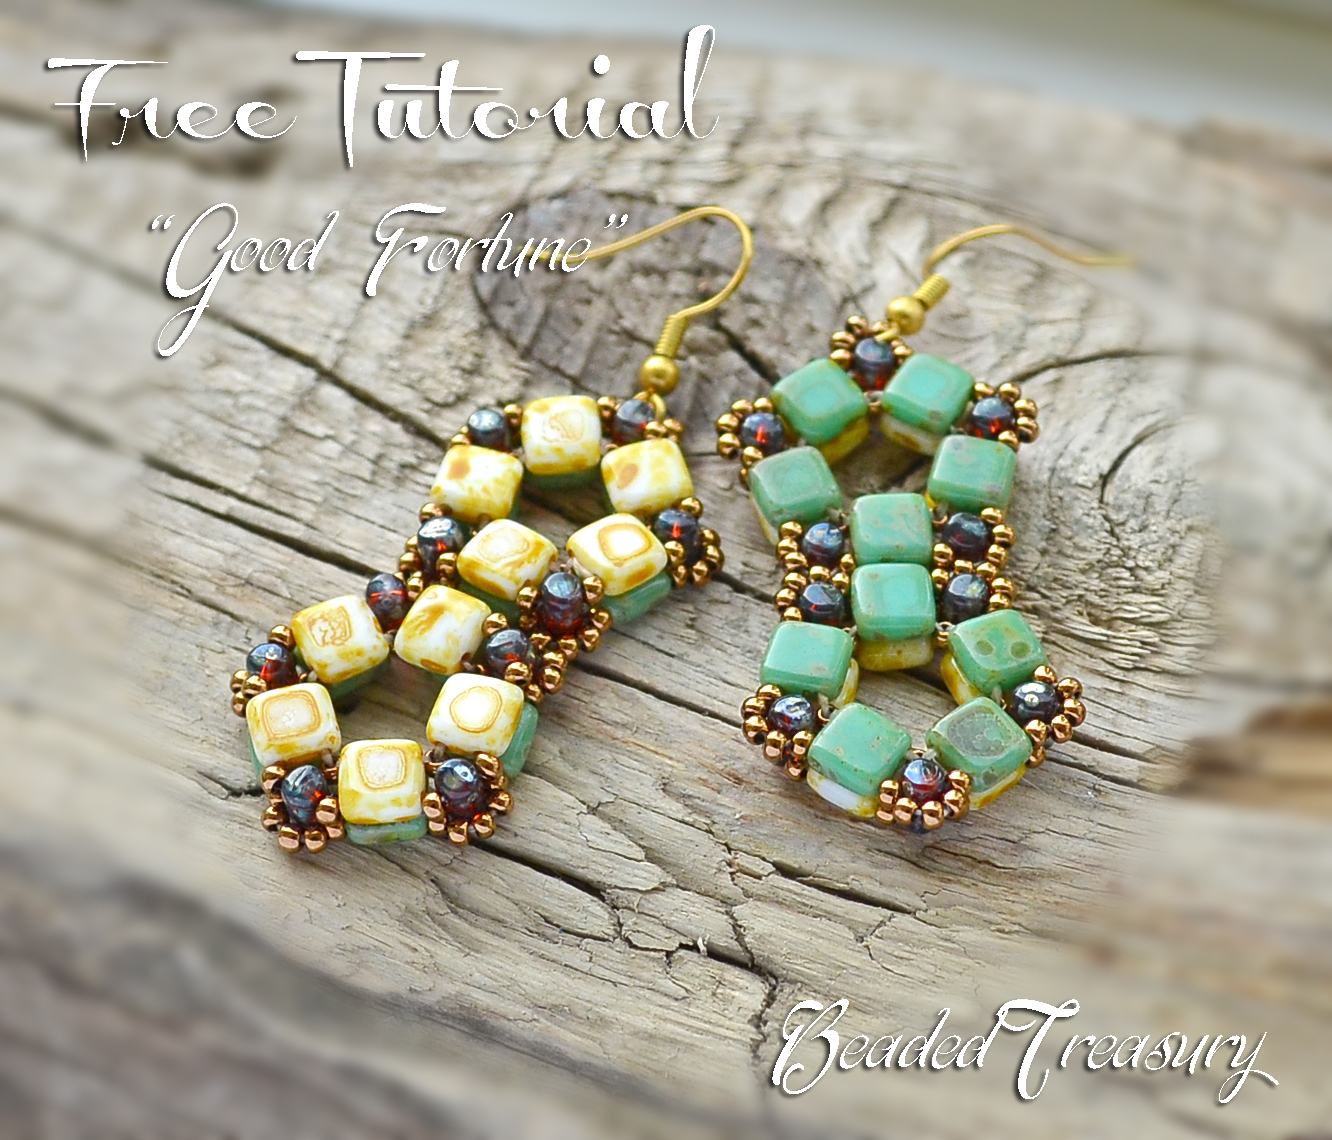
Good Fortune Earrings
Free Beading Tutorial
An original BeadedTreasury Design (© 2015 Iulia Postica. All rights reserved). This pattern is for personal use and small group teaching. It cannot be sold, republished (online and off-line), redistributed, translated without permission, or edited in any way – in part or in whole. Please always credit me as a designer. Thank you!
********************
Techniques
Bead weaving
Right angle weave
Netting stitch
Project Level
Intermediate
Materials
20 white/travertine opaque 6mm two-hole CzechMates Tile glass beads
20 turquoise green/travertine opaque 6mm two-hole CzechMates Tile glass beads
20 dark orange Picasso transparent 3x5mm Czech two-hole Rulla glass beads
2 gr. bronze Japanese 11/0 seed beads (Toho 221)
Size D cream beading thread
2 raw bronze earring hooks
Size 11 beading needle
Scissors
Finished Size
Length – 4.8 cm (1.8 inches) (without earring hooks)
Width – 2.5 cm (1 inch)
********************
INSTRUCTION
Step 1.
Cut about 80 cm (31 inches) of thread and pass it through the needle hole.
Pick one 11/0 seed bead, one turquoise tile bead, one 11/0 seed bead and one white travertine tile bead. Slide all the beads down the thread.
.JPG)
Step 2.
Take the needle one more time through these beads, in the same direction.
.JPG)
Step 3.
Pull the thread ends to bring all the beads together into a ring and secure it with two square knots. Leave a tail of 15 cm (6 inches).
.JPG)
Take the needle through the 11/0 seed bead.
.JPG)
Step 4.
Continue with right angle weave by picking one turquoise tile bead, one 11/0 seed bead and one white travertine tile bead and take the needle one more time through the same 11/0 seed bead.
.JPG)
Then take the needle through the turquoise tile bead and the 11/0 seed bead.
The turquoise tiles lie on one side and the white travertine tiles lie on the other side of the beaded stripe.
.JPG)
Step 5.
Pick one white travertine tile bead, one 11/0 seed bead and one turquoise tile bead and take the needle through the 11/0 seed bead, entering with the needle from the opposite side the thread exited from.
.JPG)
Go through the white travertine tile bead and the 11/0 seed bead.
.JPG)
Step 6.
Repeat Step 4 and add another group of tile beads. Then add the last group as following: with the working thread exiting up out of the 11/0 seed bead which is on the left in the picture above, pick one white travertine tile bead and go down through the 11/0 seed bead which is on the other side of the beaded stripe.
.JPG)
Turn the beadwork on the other side. The thread is exiting up out of the seed bead which is on the left. Pick one turquoise tile bead and take the needle through the 11/0 seed bead and the white travertine tile bead as shown in the picture above.
.JPG)
Step 7.
Turn the beadwork with the white travertine tiles facing up. Take the needle through the outer free hole of the same tile bead the thread exited from.
.JPG)
Step 8.
Pick one 11/0 seed bead, one Rulla bead and one 11/0 seed bead and go through the outer free hole of the next white travertine tile bead.
.JPG)
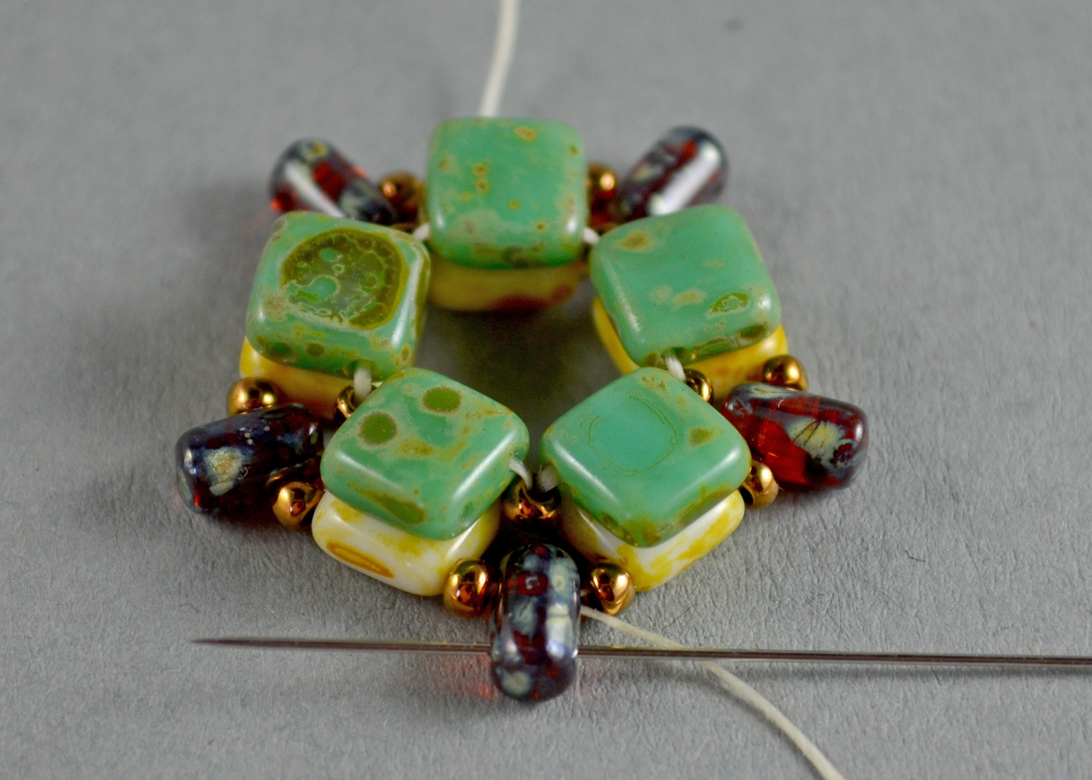
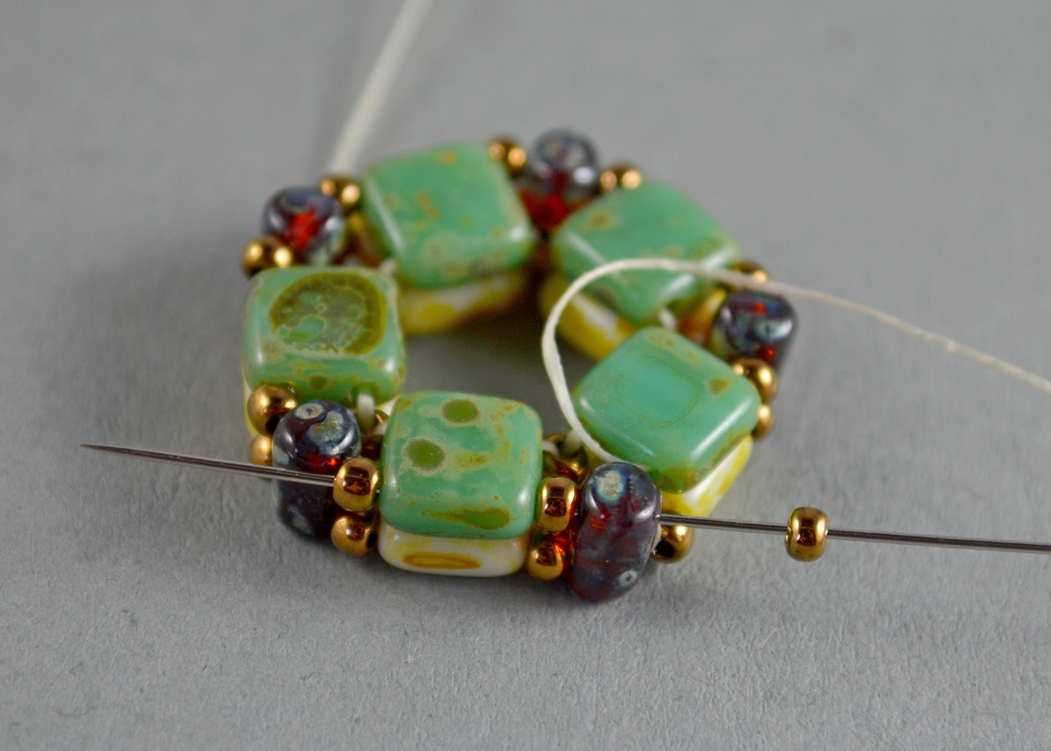
Repeat adding groups of one 11/0 seed bead, one Rulla bead and one 11/0 seed bead between the white travertine tile beads until the round is completed. When adding the last group, take the needle directly through three beads: the tile bead, the next 11/0 seed bead and Rulla bead.
.JPG)
Step 9.
Turn the beadwork on the other side with the turquoise tiles facing up. Take the needle through the free outer hole of the same Rulla bead the tread exited from.
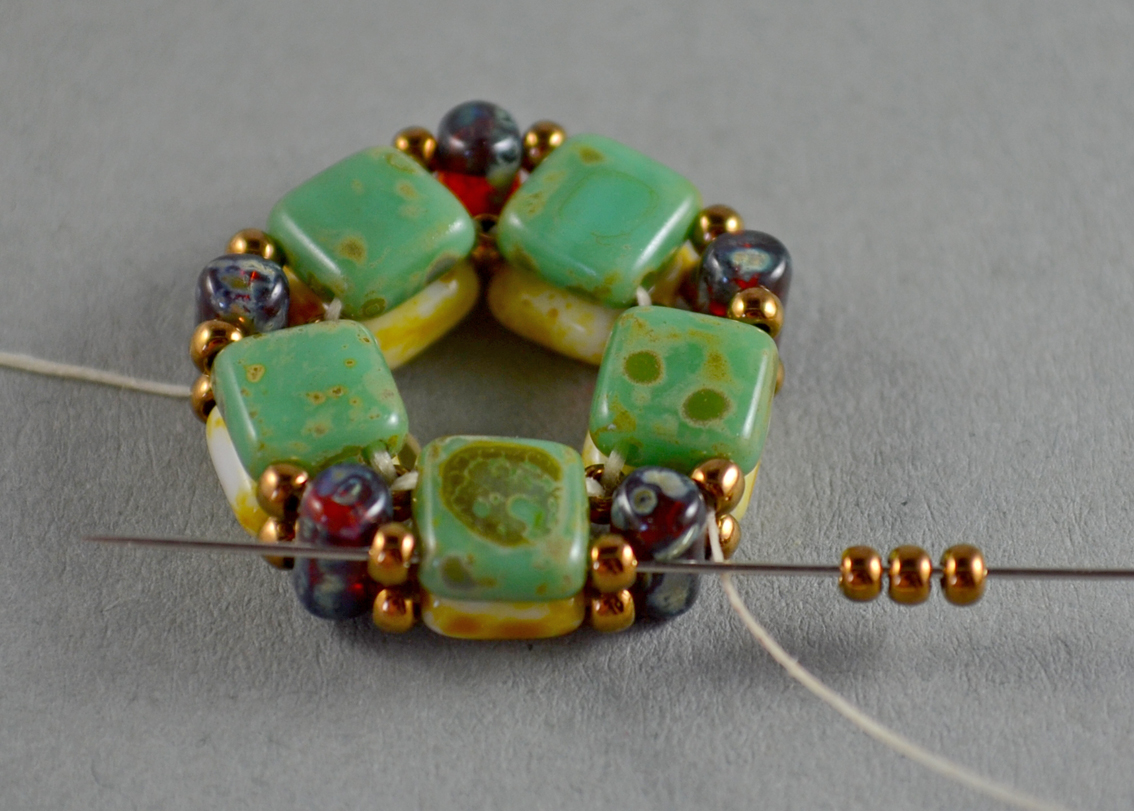
Step 10.
Pick one 11/0 seed bead and take the needle through the outer free hole of the next turquoise tile bead.
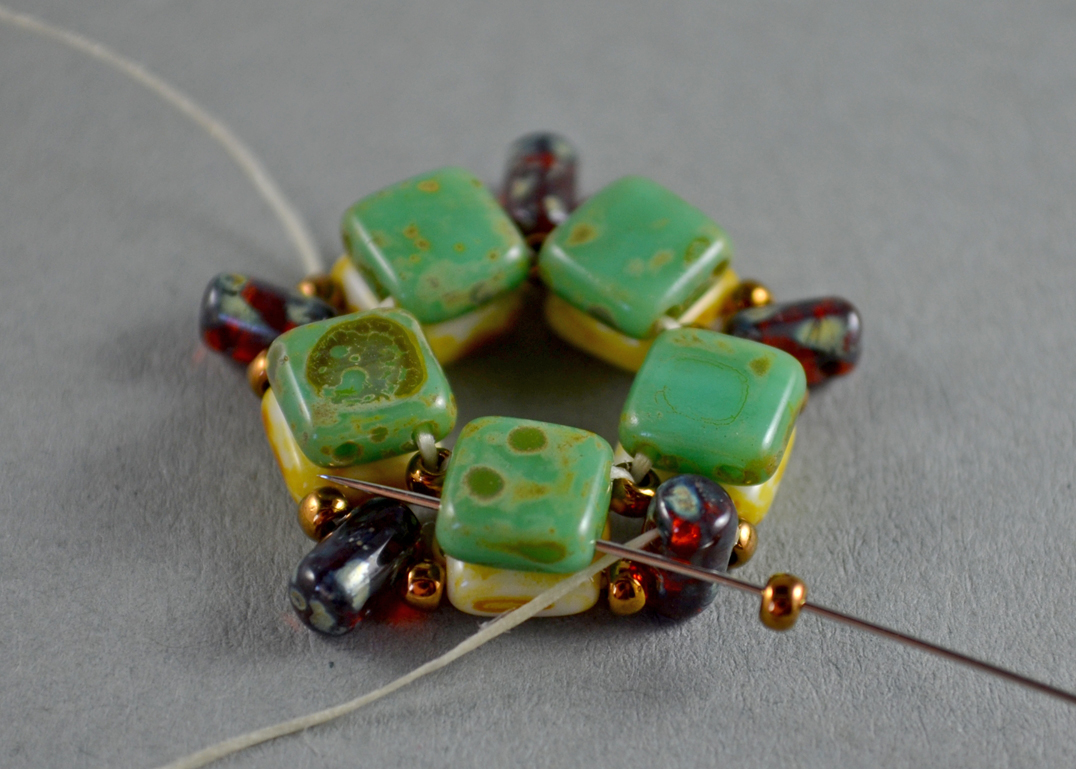
Pick one 11/0 seed bead and take the needle through the outer free hole of the next Rulla bead.
Continue adding 11/0 seed beads as explained above at Step 10 to complete the round. When adding the last one, take the needle directly through four beads: Rulla bead, 11/0 seed bead, tile bead and 11/0 seed bead.
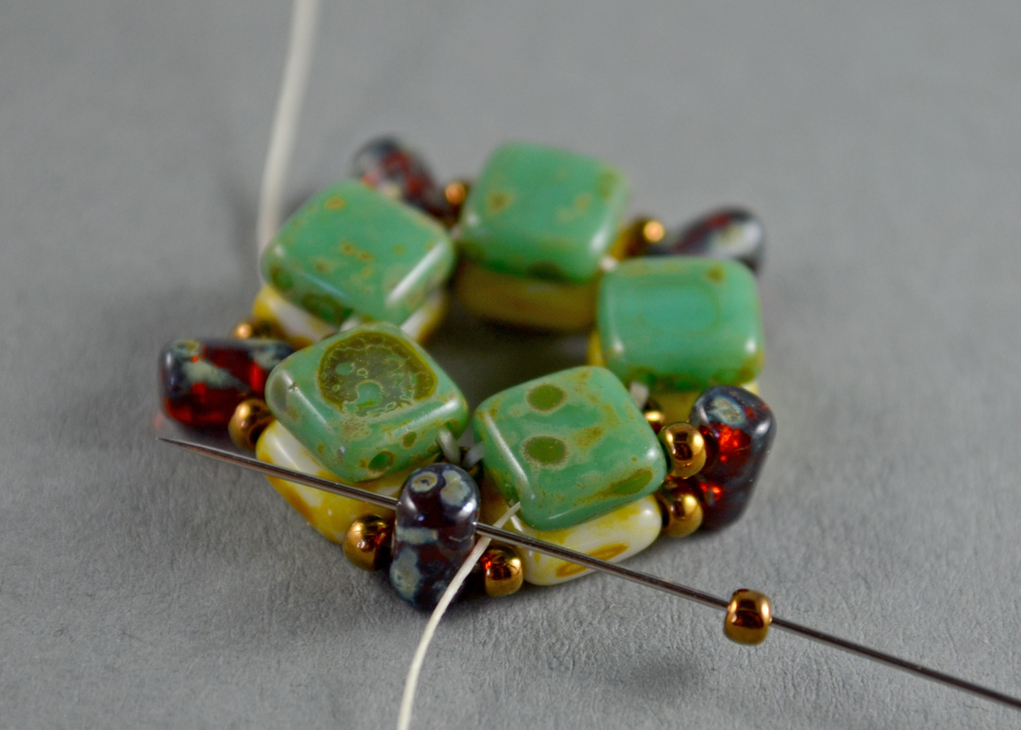
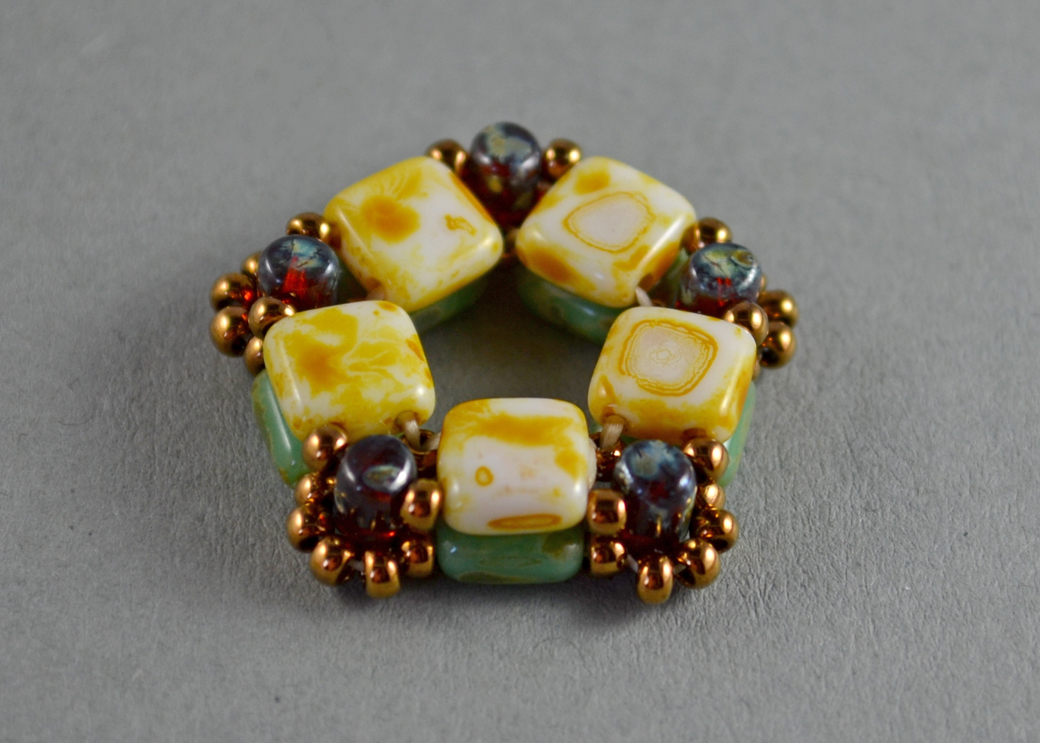
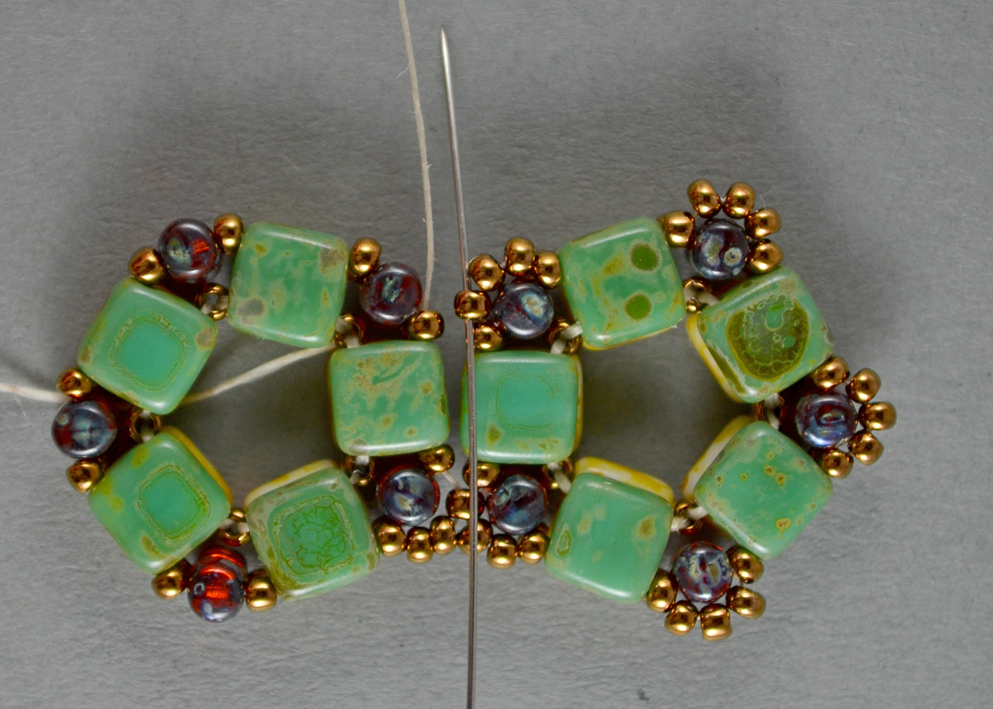
Step 11.
Pick three 11/0 seed beads, skip the Rulla bead, and go with the needle through the next 11/0 seed bead, the turquoise tile bead and the 11/0 seed bead.
Repeat this action four more times to add seed beads on top of all Rulla beads.
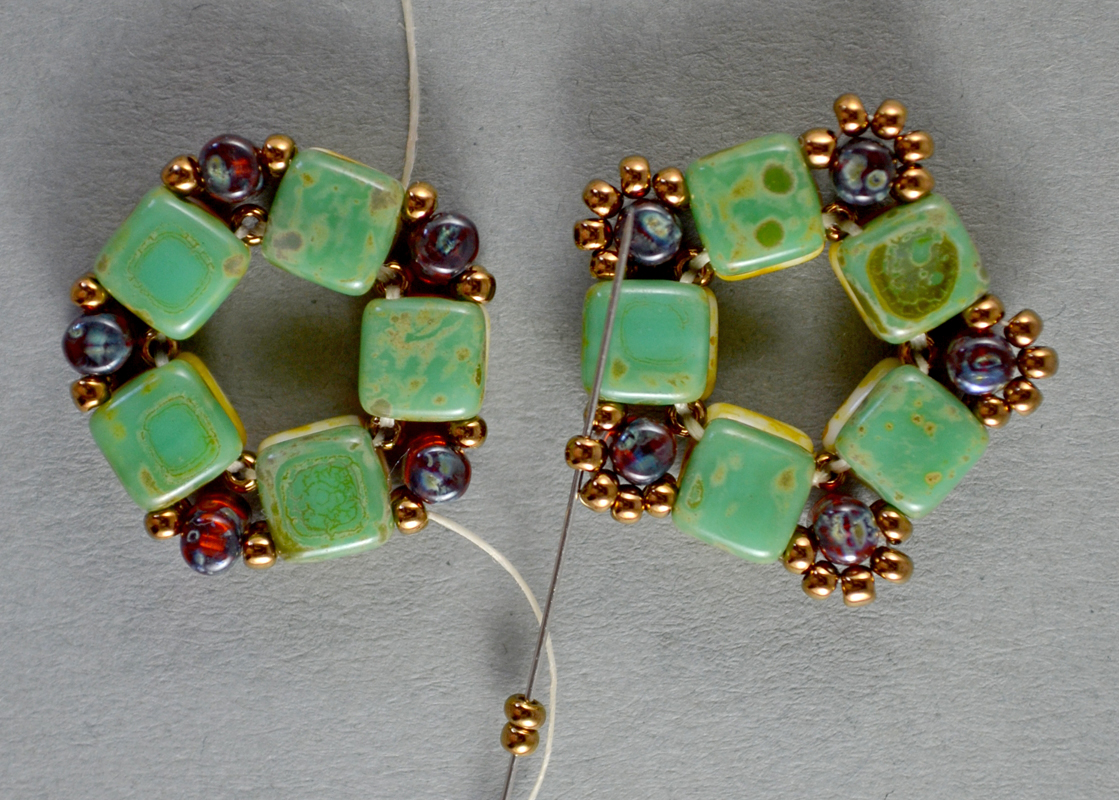
Step 12. Making the second beaded element.
The first beaded element is completed. Hide the thread ends into the beadwork and cut the excess.
Make a second beaded element following the instructions from Step 1 through Step 10.
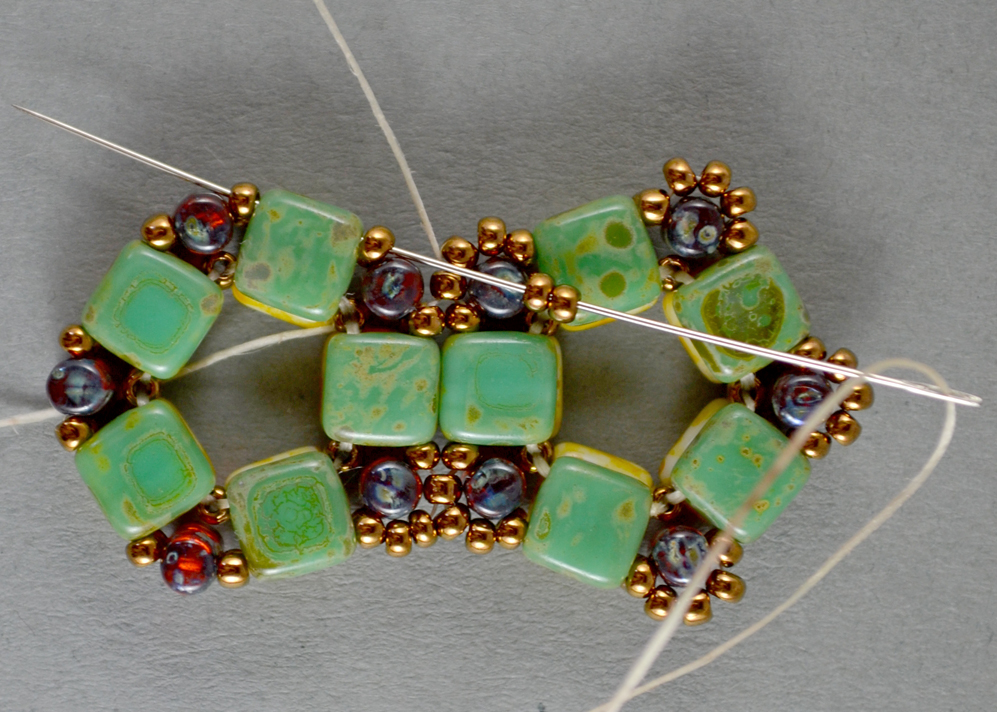
Step 13. Joining two beaded elements.
Bring the finished and the unfinished elements close. Pick two 11/0 seed beads and go through the seed bead from the finished element as shown in the picture above.
Go with the needle through the 11/0 seed bead, the tile bead and the 11/0 seed bead of the unfinished element.

Take the needle through the 11/0 seed bead of the finished element as shown in the picture above.
Pick two 11/0 seed beads and go through the 11/0 seed bead, the turquoise tile bead and the 11/0 seed bead of the unfinished beaded element.
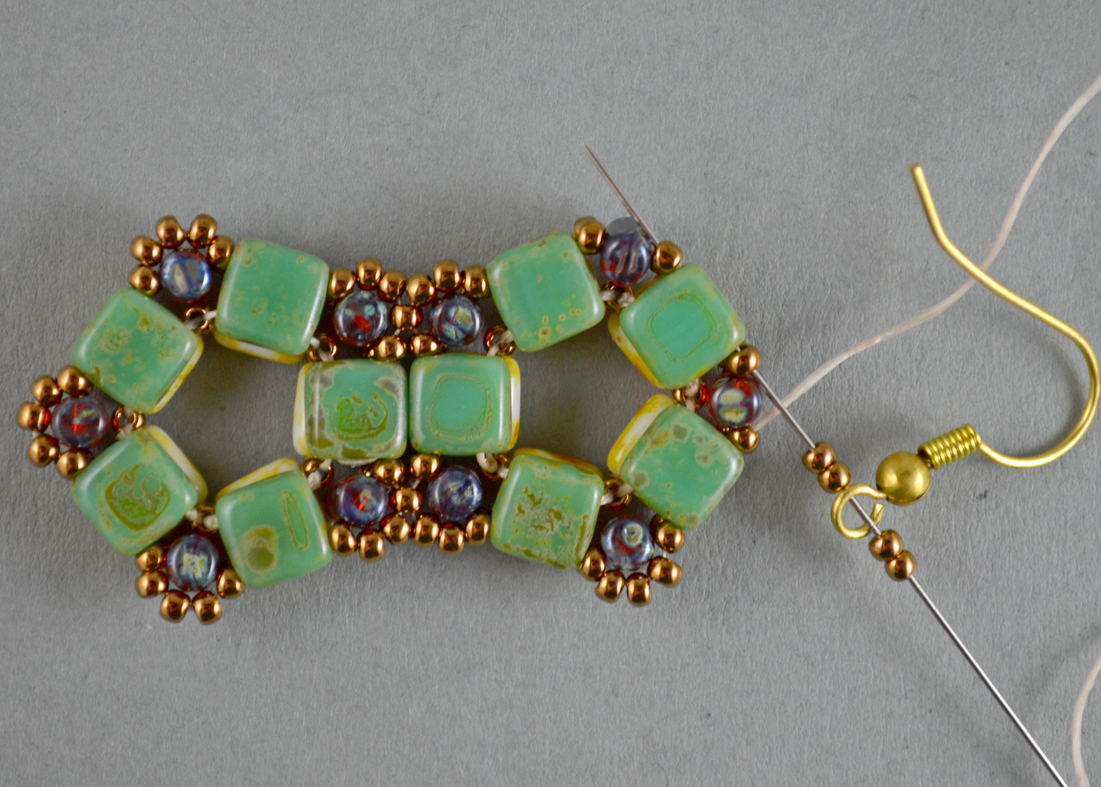
Step 14.
In the following continue beading the last row of the second element as explained at Step 11. The only exception is the loop holding the earring hook when instead of picking three 11/0 seed beads, you should pick two 11/0 seed beads, the earring hook and other two 11/0 seed beads.
After having completed the second element, hide the thread ends into the beadwork and cut the excess.
********************
The .pdf version of Good Fortune Earrings Tutorial can be downloaded HERE.
More FREE BEADING TUTORIALS are available HERE.


Comments
Free Beading Tutorial - "Good Fortune" Earrings | BeadedTreasury
Do you mind if I quote a few of your posts as long as I provide credit and
sources back to your webpage? My website is in the exact same niche
as yours and my users would truly benefit from a lot of the information you provide here.
Please let me know if this ok with you. Thanks a
lot!
Hi! That is ok! :) Could you
Hi! That is ok! :) Could you give me a link to your website as well?
earrings
Beautiful earrings and very useful tutorials!
Great tutorials, very
Great tutorials, very detailed!
Jewerly makers have a great master in you :)
Beautiful earrings! Must be a
Beautiful earrings! Must be a fun tutorial as well :)
Thanks for the tutorıal!
Thanks for the tutorıal!
thanks for sharing your skill
thanks for sharing your skill
Beautiful tutorial, and very
Beautiful tutorial, and very clear pictures, it seems easy to follow! Lovely result :)
That's a great tutorial,
That's a great tutorial, thank you so much for sharing. Beautiful earrings!
Beautiful earrings! Thanks
Beautiful earrings! Thanks for tutorial!
Post new comment